Learning Objectives
- Extend GitHub with ZenHub. Until Github releases its forthcoming Timeline product, Zenhub extends Github functionality for free to create Roadmaps that provide a Gantt chart of a Project progress by Epic, which contain multiple Github Issues. Projects and Epics have start and end dates associated with them in the context of a larger Workspace, which is associated with a set of Github Repos.
- Cluster Issues into Epics. By clustering Github Issues into Epics you can also communicate higher level project tasks and progress to non-technical stakeholders.
- Create Roadmap of Epics in Projects. The Roadmap can only work interactively with team members logged into Zenhub (with their Github logins), but you can export the Roadmap as an image.
- Export Roadmap as image to display on web page. This provides a public view of your project and progress.
1 Create Zenhub Workspace [lead only]
Choose a member of your team with admin privileges to your Github organization. Visit zenhub.com, click on Login and Log in using GitHub.
Start off by creating a workspace, granting Zenhub access to Github repositories and inviting your team to the Zenhub workspace:
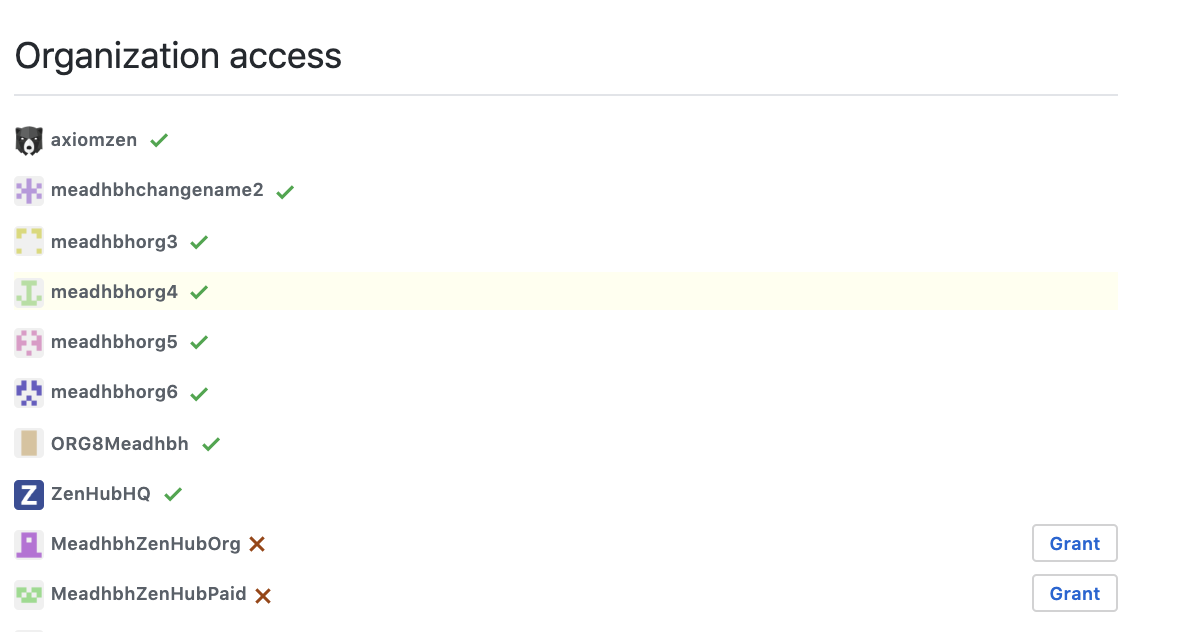
Grant ZenHub third-party access permissions in GitHub. Be sure to follow all instructions under Checking access permissions and for your Github profile (e.g.
@bbest), i.e.https://github.com/settings/applications, to ensure your group project’s Github organization has granted ZenHub permissions.
Create your First Workspace. Create a workspace named after your Github org
{org} workspace.
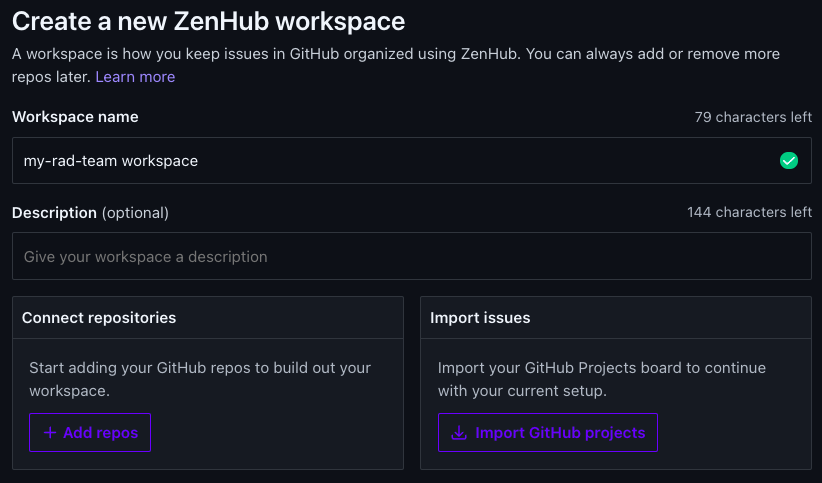
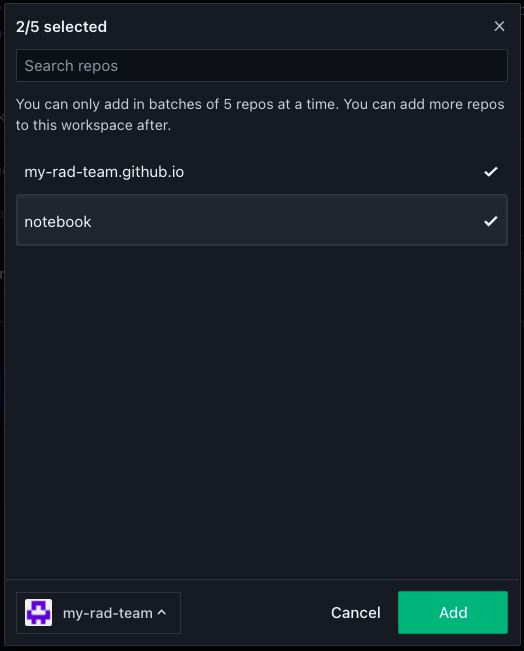
Note that the Import Github Projects option is only for the old Github Projects, not the new Github Projects Beta, so only Add repos when Creating a new ZenHub workspace. Be sure to first select your organization in the lower right.
Upon creation of a workspace you are taken to the default Board view with all open issues in the connected repositories showing up under the New Issues pipeline.
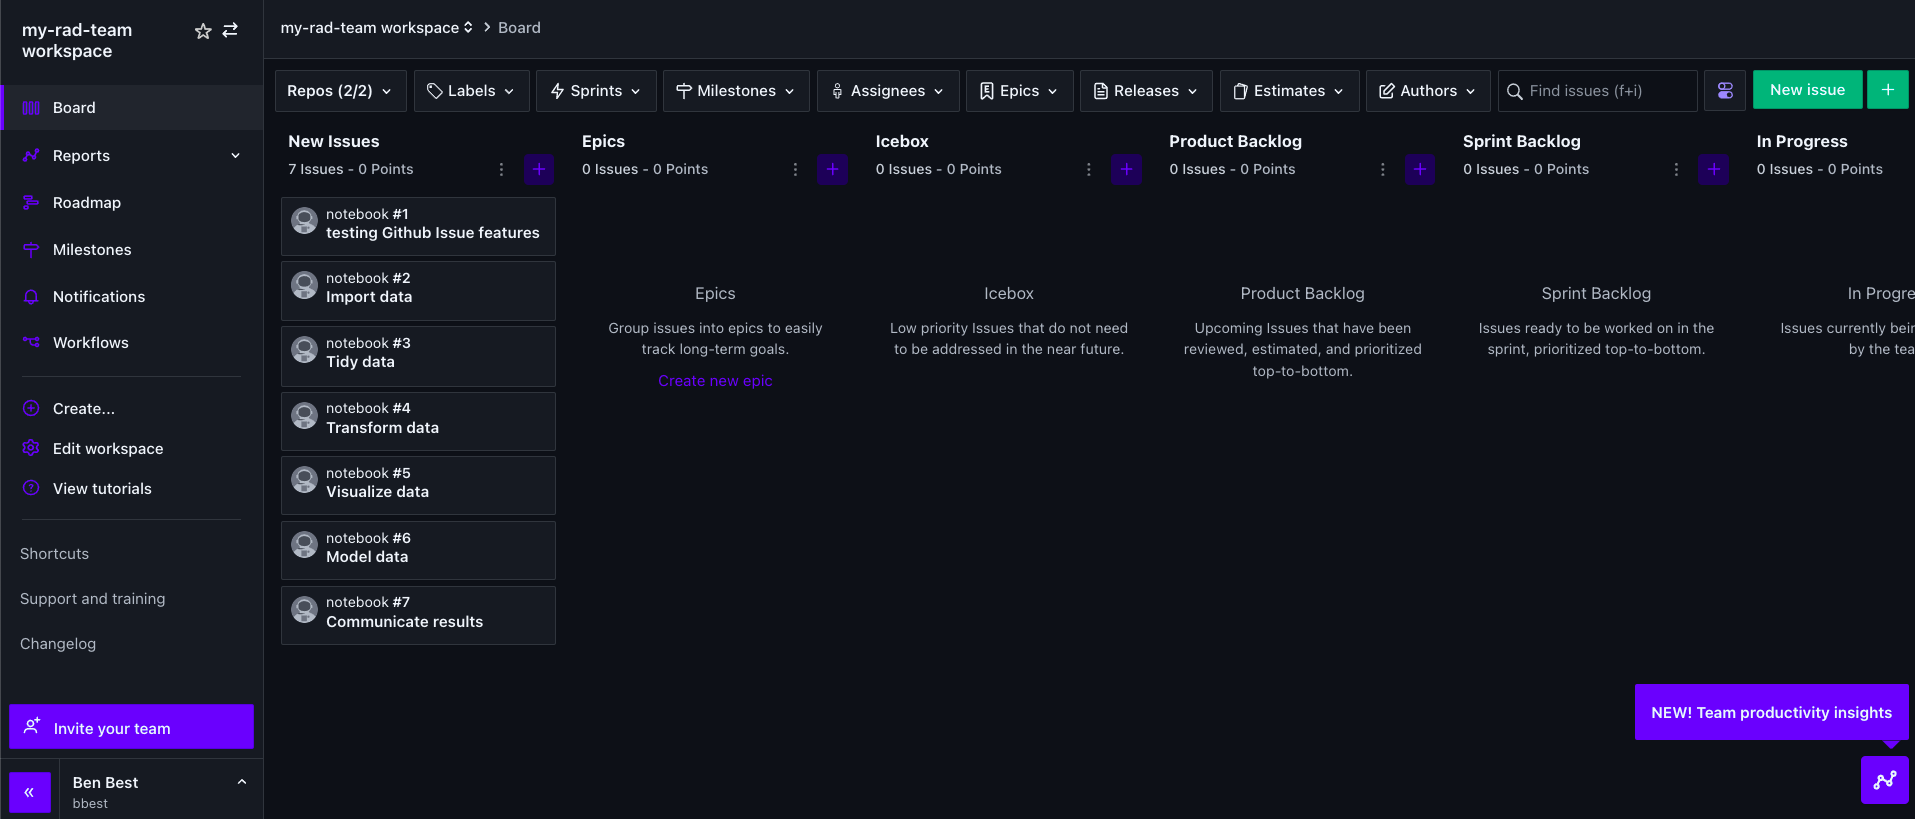
Note descriptions for the other pipelines like Icebox (low priority issues), Product Backlog (upcoming issues), Sprint Backlog (ready issues for sprint), In Progress, Review/QA, Done.Invite your Team to ZenHub.
Be sure to invite me by sending link toben@ecoquants.com. Otherwise I will not be able to view (and grade) your workspace.
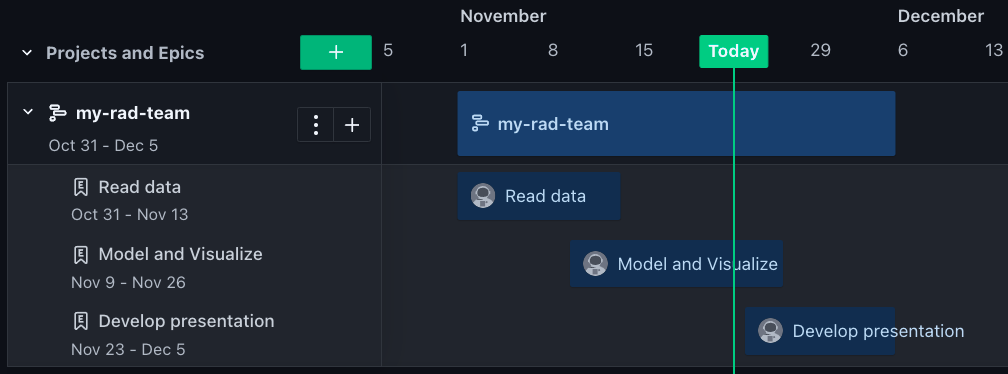
2 Create Roadmap
Click over to the Roadmap menu.
Create a new project. You can give it the same name as your
{org}. Set the dates to start from when your Lab 1 Gantt chart started, e.g. Nov 1 to Dec 5, 2021.
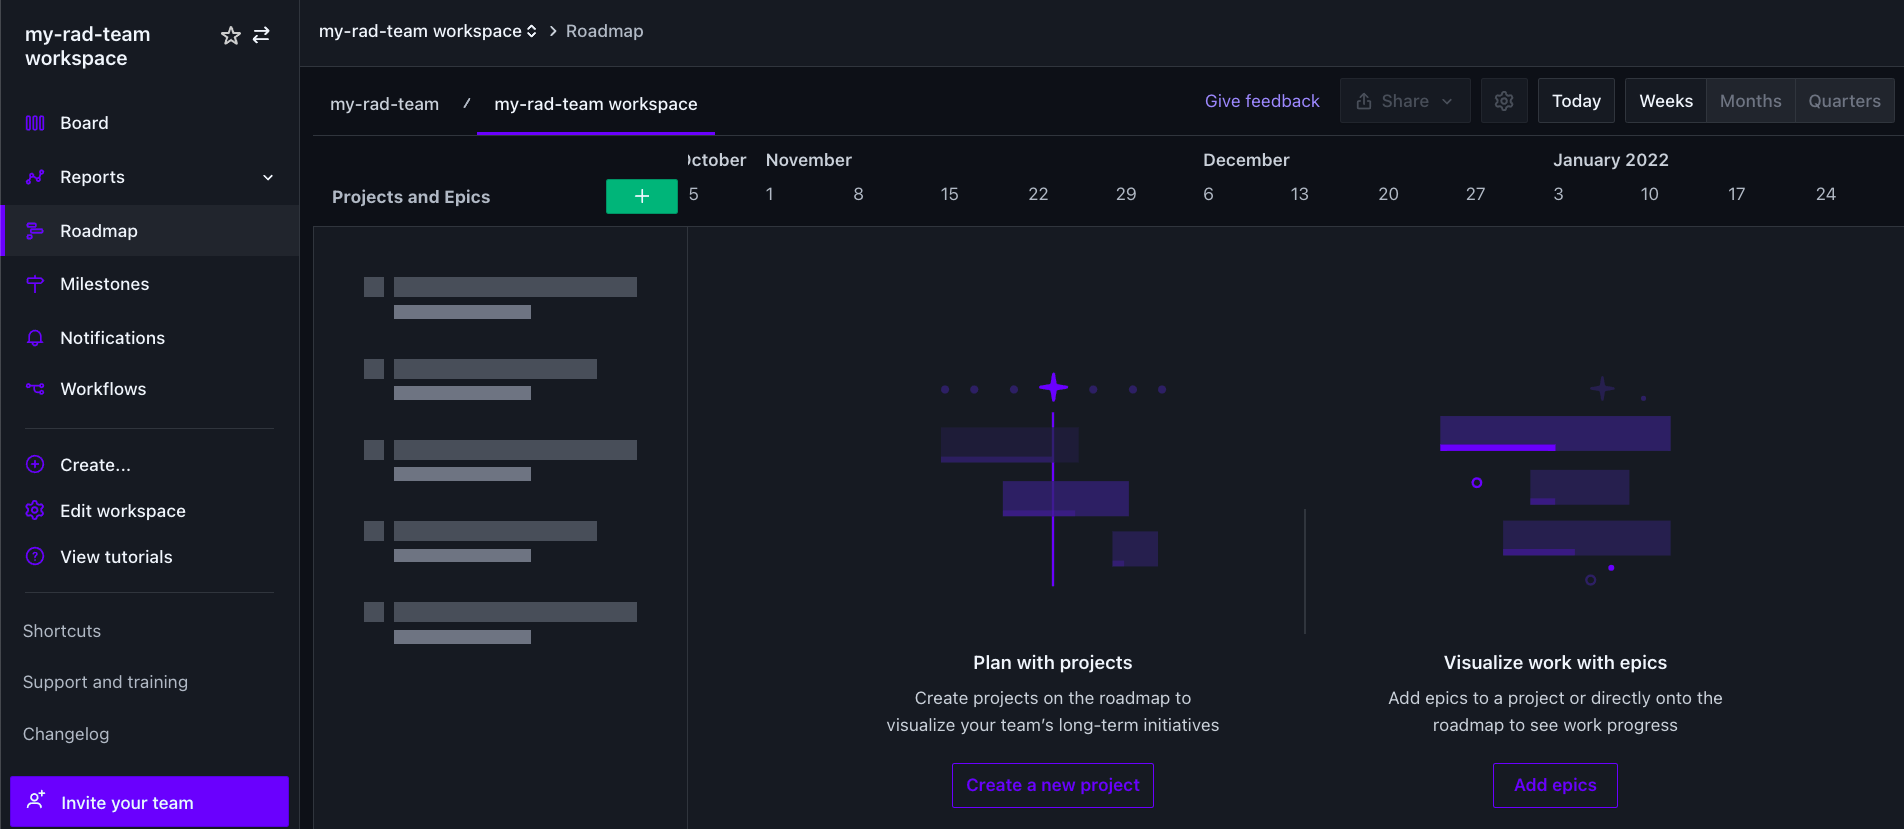
Add epics by clicking the plus sign
+next to the project. Create epics that describe the major phases of the project and set start/end dates. To associate Closed issues with an Epic, you might wna
Add issues to the epics by going to the Board, selecting issues by clicking on the upper left avatar of the issue to select it and then the Set epic button.
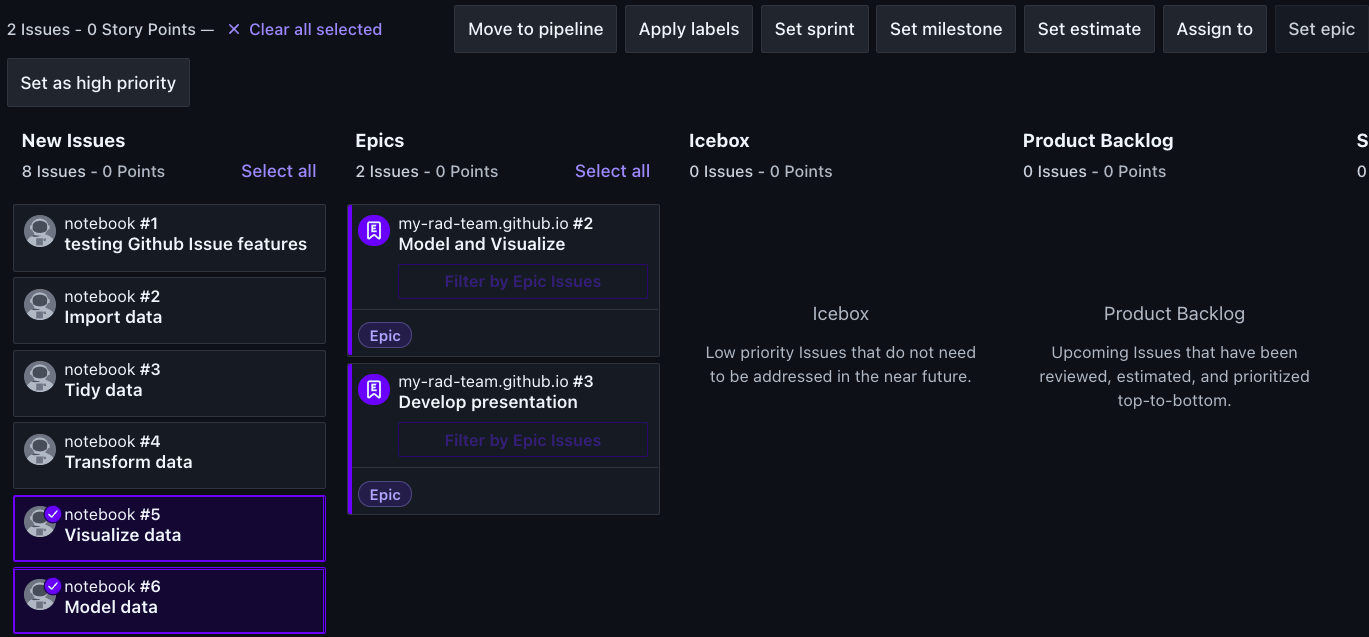
clicking the linked name of the epic, and in the Epic view click the link to Add issues to this Epic.
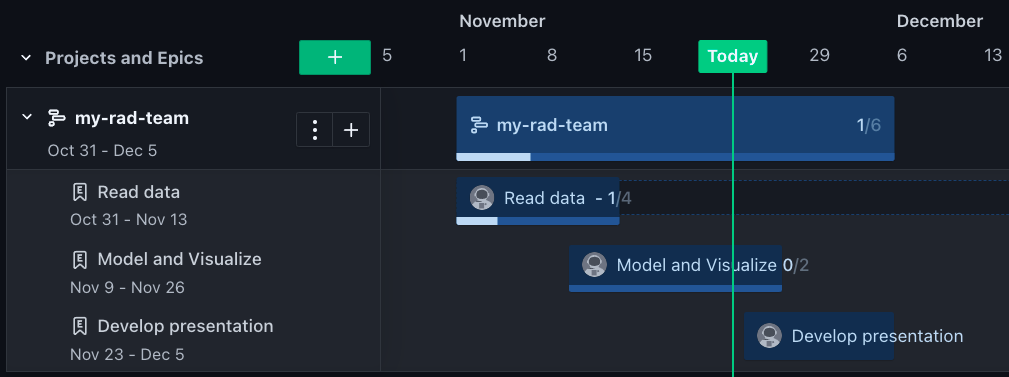
Note that as issues close, the progress meter increments for the associated Epic and Project.
3 Add Roadmap to Website
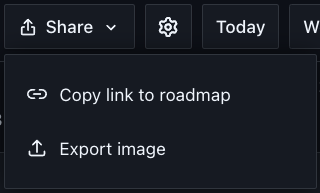
You can share a link to the roadmap, but only members of your team can view it. You can, however, export it as an image.
Export image of Roadmap with the Share button and save as
images/roadmap.svgin your{org}.github.iorepo. You might want to prepend the date by a week to get it to show properly on export.
Add Roadmap page to website. Create a roadmap web page with this image. Add a menu item for Roadmap to your website. Hints:
Use the markdown syntax for including an image
in a new Rmarkdownroadmap.Rmd.Menu items are determined by your
_site.yml. See: 10.5 rmarkdown’s site generator | R Markdown](https://bookdown.org/yihui/rmarkdown/rmarkdown-site.html)).You can rebuild the whole website by either: 1) clicking the Build Website button in the Build pane of RStudio; or 2) running
rmarkdown::render_site()in the Console pane.Be sure to git push the website and ensure the new page is publicly accessible.
4 Submit Lab
Please submit the links to the Zenhub Roadmap and your website page via the following Google Form using your UCSB email: